Well today my oldest son had his wisdom teeth removed. So far all has gone well and he is happily snoozing in a narcotic fog LOL! But, I did want to share a wonderful pin that helped get us through today! http://www.pinterest.com/pin/46865652346358658/
 These little goodies really work. I was able to gently shape them to his face and being a little mushy allowed them to not poke or have hard spots like traditional ice packs.
I actually made 4 of them so that I could always have 2 hardening up in the freezer. The only thing I would probably change would be to double bag them as one leaked some once it started to defrost. Granted it was an easy fix just re-zip the bag, but who wants to smell like rubbing alcohol.
So that is all for today, as I am heading back to my nursing duties! Hope you all have a wonderful and blessed weekend!
These little goodies really work. I was able to gently shape them to his face and being a little mushy allowed them to not poke or have hard spots like traditional ice packs.
I actually made 4 of them so that I could always have 2 hardening up in the freezer. The only thing I would probably change would be to double bag them as one leaked some once it started to defrost. Granted it was an easy fix just re-zip the bag, but who wants to smell like rubbing alcohol.
So that is all for today, as I am heading back to my nursing duties! Hope you all have a wonderful and blessed weekend!
As promised, here is a really quick tut on my accessory piece for my Magnetic Grocery List. I wanted to have a quick and handy place to write a note, without it being on my grocery list. And lets be honest so that none of the lovely men I live with from walking off with my list because they needed a piece of paper LOL!
I gathered my supplies: old magnetic sign, scrapbook paper, hot glue gun, wire, small alligator clip, double sided tape, straight pin, and most importantly a foam coaster I bought on clearance a while back.
I cut the paper and magnetic sheet to the size of the coaster. I used the tape to attach the paper to the coaster. Next, I placed the post its in the alligator clip and decided where I wanted to place it on the coaster. Now I took the pin and made a hole on either side of the clip.
I then cut off a piece of wire and fed it through both holes and attached the clip. I twisted the wire together tight, but not so tight as to bend the coaster.
I really poured on the hot glue to the magnet square and pressed it on to the coaster. Now, remember this is going to be very hot so be careful. I flipped it back over and pressed down for about a minute.
Lastly, clip the post it notes with the clip. And that is it! Love a really quick project that has big bang! I think I may even make another without the post its to clip messages that I need to keep up with!
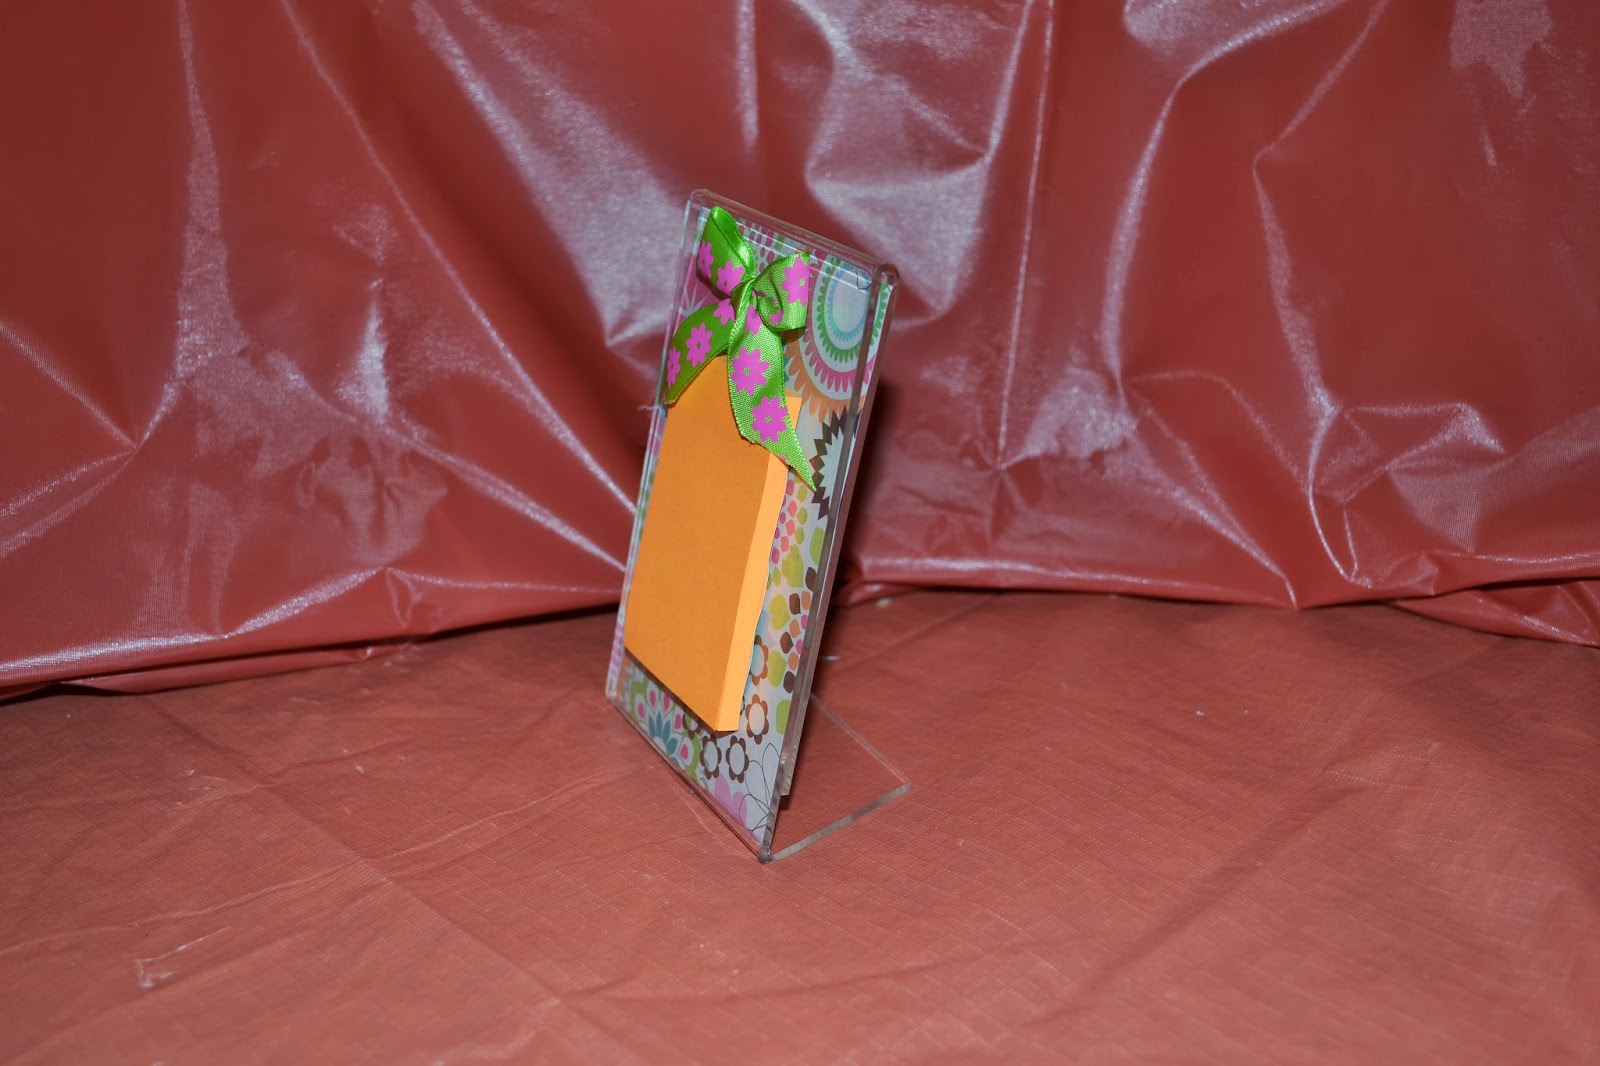
While we are at it I will show you this really quick free standing post it holder. This is just a simple frame with a scrapbook paper insert. Then I hot glued on the post it notepad and cute bow. This has the potential for being my spring teacher gifts! I know you are thinking, " I thought you homeschool?!" And you are right I do, but my boys are highschooler. That being said there are classes that I don't want to, nor feel qualified to teach. So my boys take several classes at a co-op and my oldest has started Lone Star College for dual credit this year also.
Don't forget to check out our etsy store http://www.etsy.com/shop/TheEssenceOfSSS?ref=search_shop_redirect we just put on a new wreath. There is another coming quickly.
Today, I made myself a new grocery list for my fridge! I've had several varieties of magnetic notepads, but they all seem to run out so quickly. I just get everybody trained to write it down when you use the last of it and them the pad runs out OHHHH! And of course, it will take me two or three shopping trips to remember to get another one.
Then on pinterest the other day I saw this huge version of what my grandmother use to keep on her counter top. http://goodideasforyou.com/mix-a-match/3195-simple-a-brilliant-message-board.html Now I unfortunately, do not have the space in my little kitchen for something this huge and to be honest who wants to carry something that big into the grocery store. But it did get me to thinking (insert light bulb here!), I could combine the short lived magnetic pad with the long running roll in a good size. Ta-Dah the answer!
To start I gathered all the thing I thought I would need, with of course a few choices in the paper. I did end up adding a few more items, but I took a shot of them later to show you.
As you can see I have some foam core, hot glue gun, Goop adhesive, an old Reynolds box, decorative paper, stretchy bands, adhesive tape, an old magnetic sign and adding machine paper.
I started by deciding how wide and long I wanted my foam board back to be. Now remember I am doing this for me so I was perfectly happy to eyeball things. I decided that I wanted it to be almost the entire length of my 12x12 paper. So I cut the board, traced it out on the paper and attached the paper with my tape runner. Then it hit me! How was I going to attach the roll to the foam board, hmmm? I decided to pull out some craft wire that I had around (I'm sorry I don't have the gauge, but it is fairly sturdy). Then I chose two appetizer toothpicks from the cabinet.
I first inserted the toothpicks into the foam board on either side of my roll so I would know the size was right.
Next, I poked the toothpick completely through the foam board (be sure that you put an old magazine or something under it so you don't mar your table). Then I broke the toothpicks off to about an inch to an inch and a half. I cut of a fairly long piece of wire and wrapped it around the toothpick several times (maybe 4-6). I found that a pair of pliers helped. I put the wire through one of the holes, through the roll, and back through the other hole. I then repeated the toothpick wrap on the other side. The reason I did this is to help distribute the pull of the roll across the back of the board and not just on the hole.

Then it was time for the rubber bands. These are from one of those sets of drink markers. I'm sure a regular rubber band would work I just like the color of these. I put one band at the top to hold the paper smoothly and one at the bottom to help keep it down and for tearing. Now here comes the Reynolds box. I cut a small portion of the blade (just wider than my paper) off the box and used the Goop to attach it to the band. This stuff says that it will attach to rubber. I put it with the blade at the very bottom of the band.

Lastly, I attached the magnetic sheet to the whole thing. Now I used the same Goop that I had before in the center and hot glue on the outside edge. Yes, I do want immediate satisfaction, but I would probably use only the Goop next time since I had to VERY careful not to let them touch for fear of some kind of chemical reaction (okay, I am a worry wart, but better safe than sorry). I then used extra foam board and clamps to hold the glue together around the bands. I let this sit for about 10-15 minutes then took them off and put some heavy books across the whole thing to finish up drying for a few hours.
Note: I did add a pencil holder from Office Depot.
Check back and I'll show you the Post it version, as well as, a stand alone version. I am thinking that these could be great teacher gifts or even Grandma gifts. I am trying to eliminate the useless nick-knacks from my buying list!
I just wanted to share a moment from our lives last weekend. The Traveling Vietnam Memorial Wall came here to Magnolia and on Veteran's Day weekend.
I've never had the opportunity to visit Washington D.C. but have always wanted to visit all the incredible monuments. This was a fabulous opportunity to feel a little connected to those amazing places.
The Wall itself was quite something to see. But the silence that seems to fall around it brings
home all those young lives that were silenced in that far away place. As a mom of two boys my heart ached as I looked at those names. Though, for all its sadness there is something really wonderful about that monument. I hope that if it ever comes near your home that you and your family can take the time to visit. And thank you again to all those that have and do continue to serve this country!
Hi, everybody! And welcome to my brand new blog. I ask for your patience and understanding as I learn to maneuver the blogging world. I am the first to admit that technology is not really my thing, but I hope I can share some fun information that will make my learning curve worth riding! LOL!
The plan is to share some of my own adventures in crafting, cooking and life, while exploring some of the fun things that I can't help pinning! Stacey will be joining me with some great fun of her own and her mom, Sharon, will drop by sometimes, too.
So let the fun begin!
I want to share with you some of the ideas I've had for the new "boxes" my wonderful hubby made me.
He actually made these from an old pallet I had here at the house. (Okay, so I still don't have a compost pile) The handles all came from the Re-store. If you haven't been there keep coming back and you will get a tour soon. I love to recycle or up cycle as a lot of people call it. Lets face it times are tough everywhere and I am, to be honest, cheap!
He originally made them for me to be the centerpieces at a wedding shower I recently hosted. They came out so wonderfully that I wanted to reuse at least one of them. So my fall centerpiece idea was born.
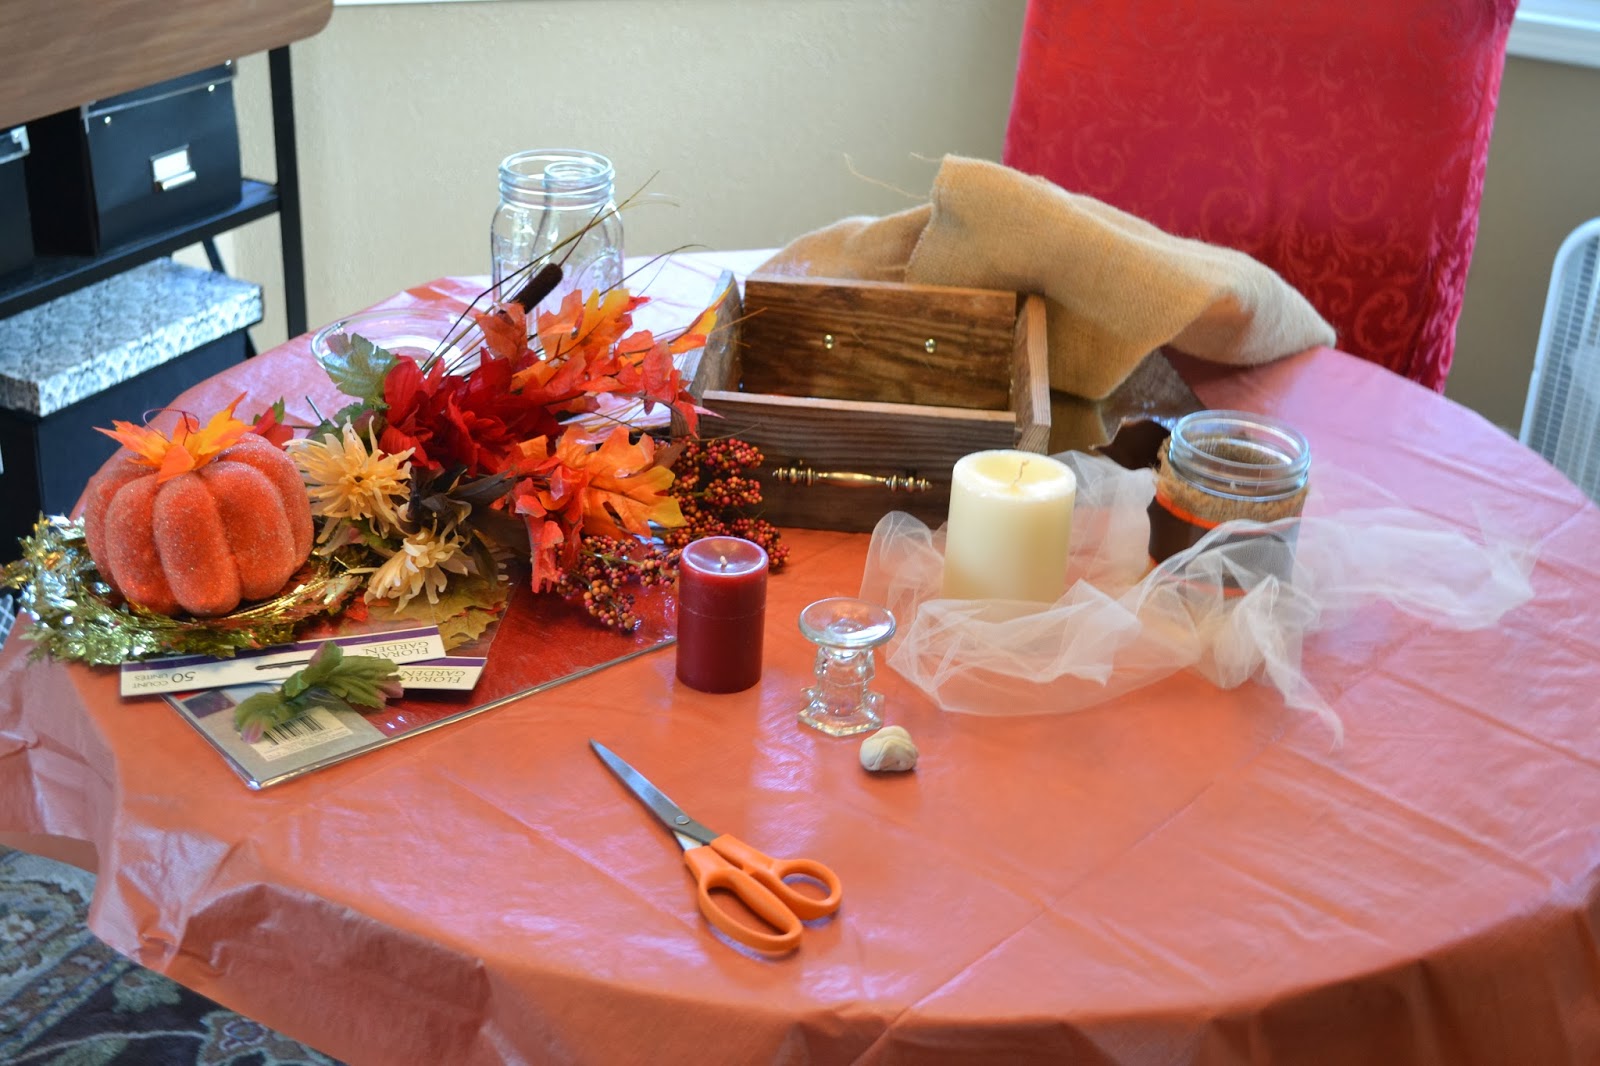
I am going to quickly walk you through the steps I used to make this centerpiece. First, I gathered an assortment of things that I had around the house. No I didn't use them all but I like to have a lot of options as I am assembling. Often what I think is going to be perfect just doesn't quite work so I like to have something else at my fingertips, just in case a change is in order.
And actually, there is one more item that I ended up digging for that didn't make it in the picture and that was the lid to a mason jar. Do you see it in the arrangement? That is actually what my candle is sitting on!
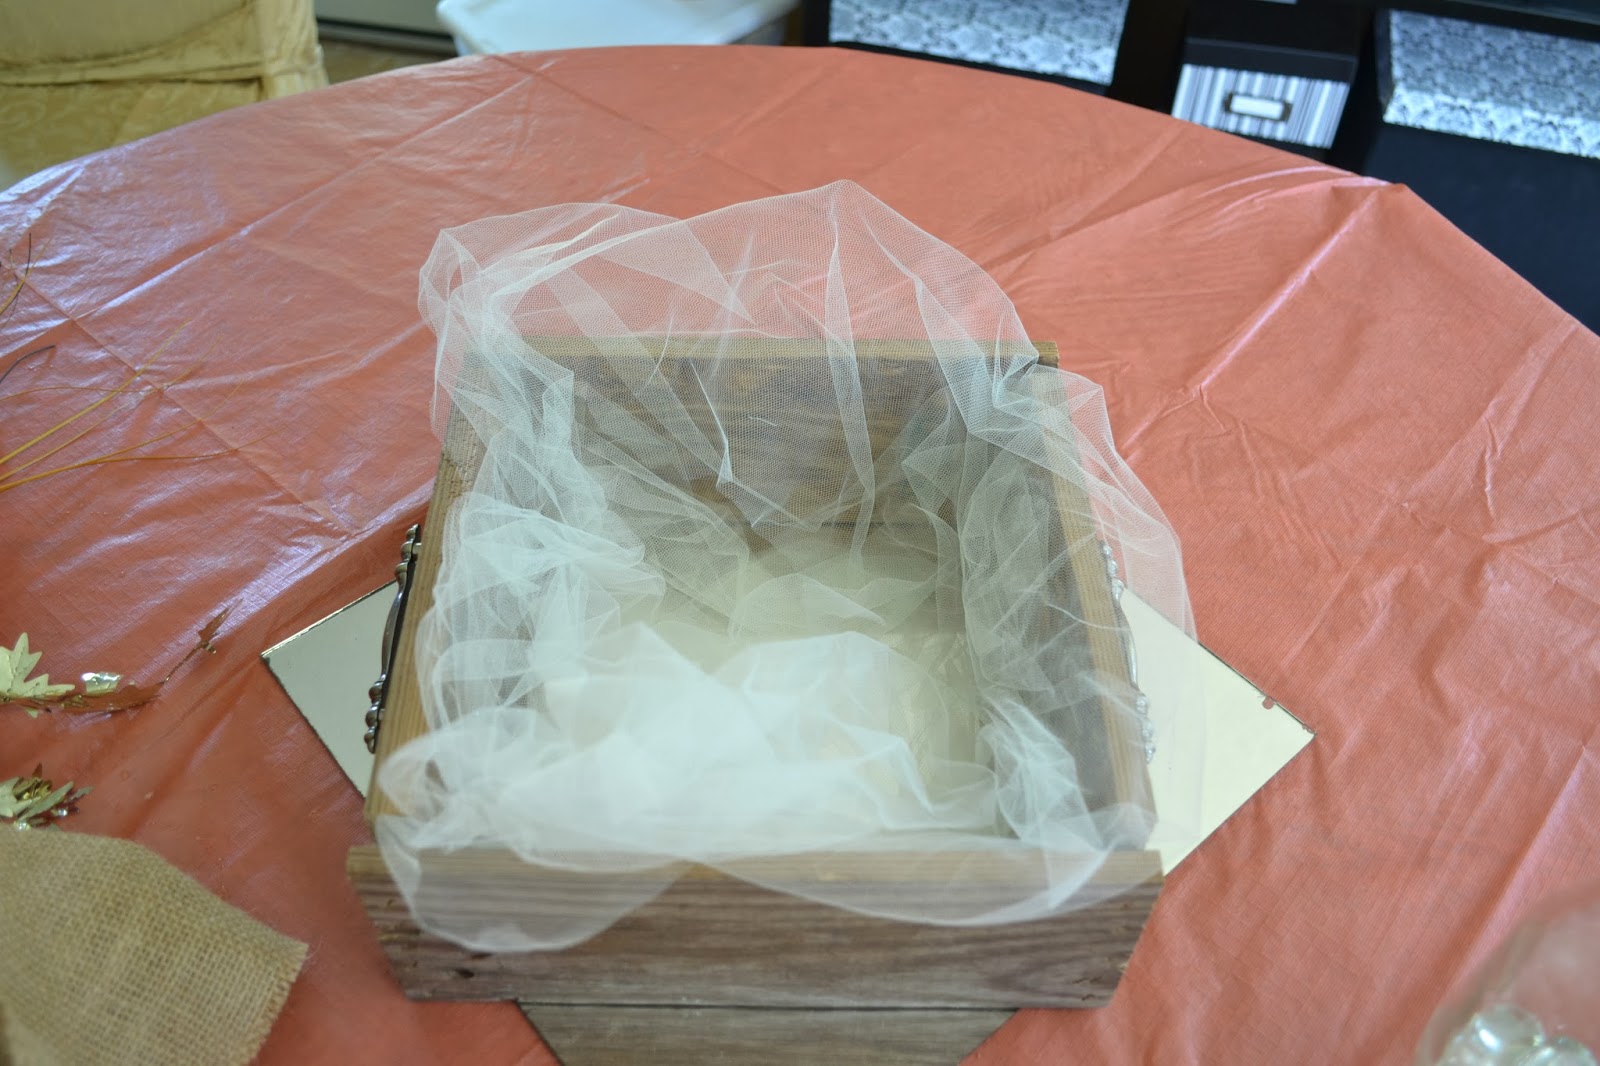
The next step for my assembly was the tulle. It is just about 1/2 a yard that I bought at Wal-Mart (Don't you LOVE that they brought their material back? It's still not what it was but I'll be happy with what I can get.) I just opened it up and stuffed it in. I intend to do a lot of pushing and pulling on it so there is no reason to fuss with it to much right now.
Next, I added the large pieces that I knew I wanted! That included a little pedestal candle stick holder for the pumpkin. A tall candle stick for the small pillar candle. And a jar for my flowers. Now I did try several different bottles and small vases before I settled on this recycled Starbucks bottle.
I don't know if you can really see in the options picture but I have several different candles stick holders and bottles. I have a variety of both of these items around my house. Alright, to be honest at least a box of each! I also, love cake stands. To the point that I must always be limiting myself. I generally want clear ones of each. They give me the most flexibility in decorating. I can always add color in and around them without them taking away from whatever theme I have going on. And lets not forget they SPARKLE!
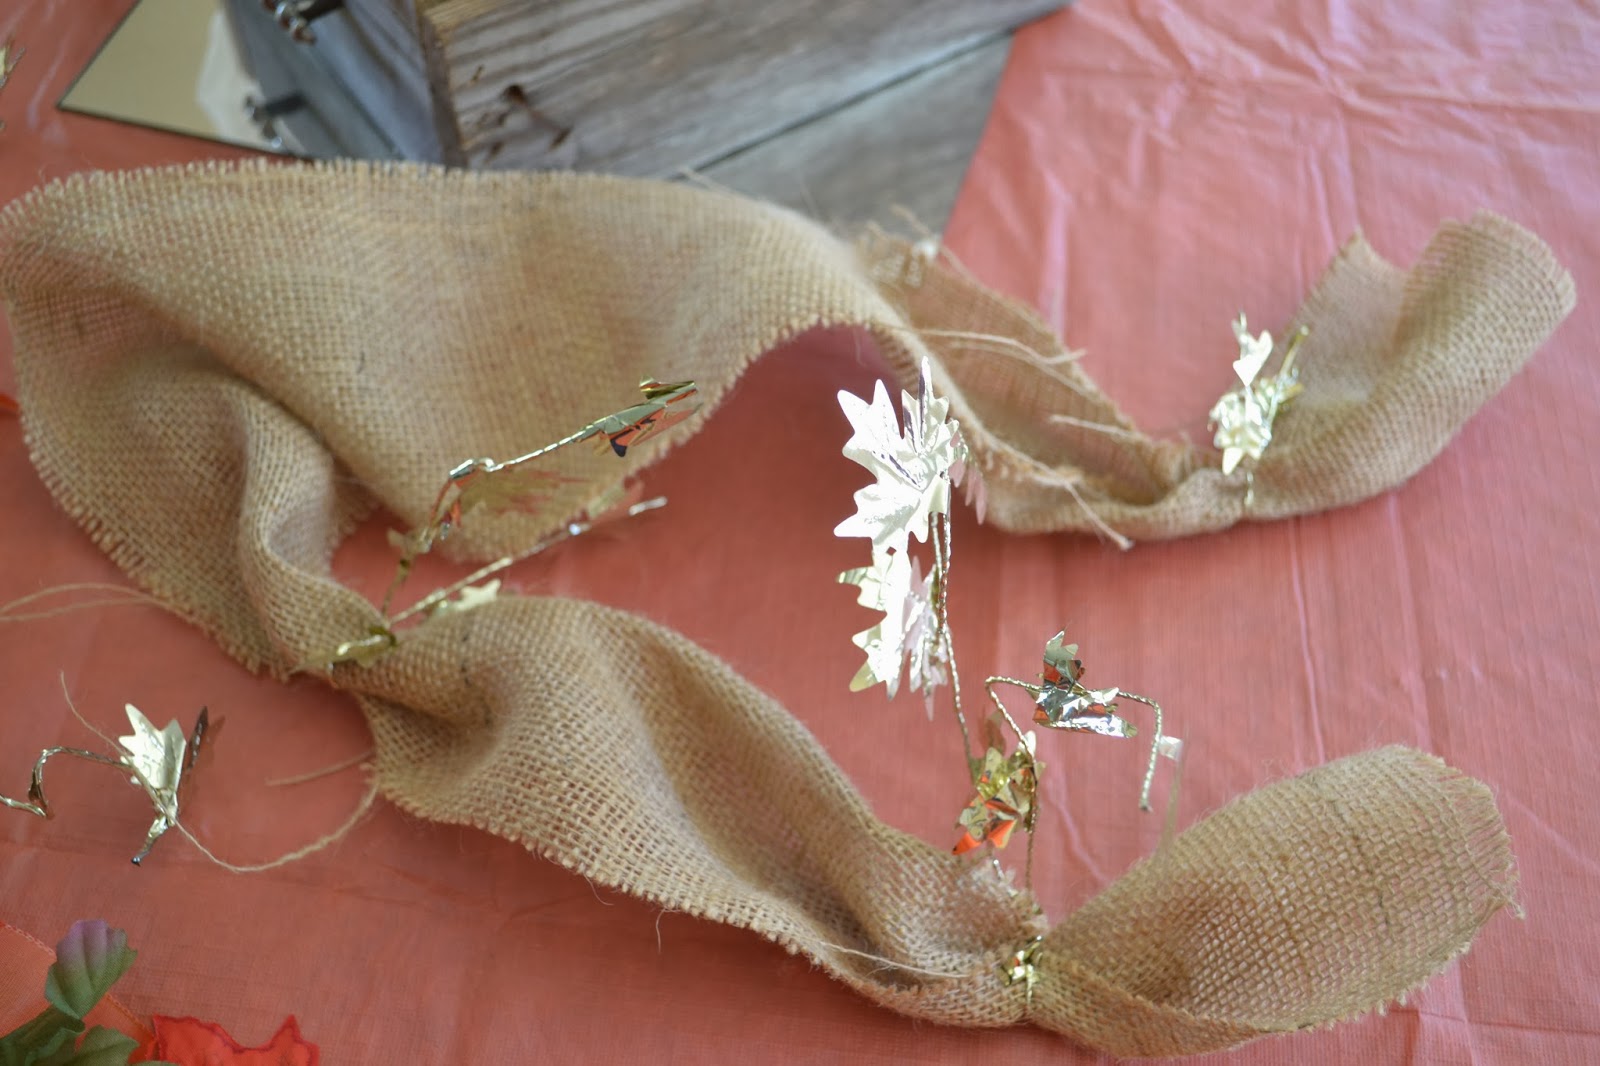
Once the large pieces were in I decided I really wanted some more texture for my fall theme. So I took a small piece of burlap and added some gold wired garland. The wire helps to give the burlap a little more body so it won't be slipping down into the box.
Now the real fun begins, the color and pretties! I placed the pumpkin first since I knew that was going in. Next, I played with some candle options. Deciding that the burgundy was a good color balance for that side and I liked the size. Now I had to decide what to place it on. The candlestick it self was just to thin. And the big plate I had took up to much room. So I went digging and came up with this mason jar lid. I loved that additional touch of gold that it added as well as the size.
To attach the candle to the stick I used some 3m repostionable putty that I have. It keeps it from moving around and will come off when I am done!
Then I added the silk flowers and the bow. I really intend for this piece to be seen from the front, but I didn't want the back to be ugly! So I did add a few more flowers for the back to fill it out. I also, added some clear rocks for balance.
Now I do want to add a few cautionary thoughts if you decide to make this centerpiece yourself. First, my box does not have a bottom. So I set it on a mirror that I can easily lift off it I need it to come off the table. Next, and MOST importantly is that I do not intend to actually burn this candle. It would definitely be a fire hazard this close to the silk flowers.
Lastly, I added some fall leaves and VIOLA! we are done!
I hope this inspires you to look around at what you already have and then make yourself something that makes you smile like my centerpiece does each time I look at it.
Note: I have a few more ideas for these boxes that you will see in future post!


